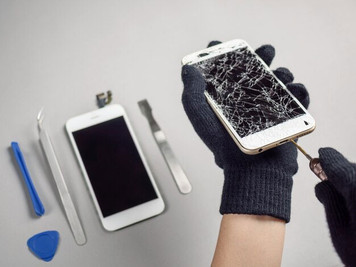
How to Fix a Cracked Phone Screen: A Beginner’s Guide
Should You Repair It Yourself?
✅DIY repair is best if:
✔ The crack is minor (no deep shattering or touch issues).
✔ You have a mid-range or older phone (cheaper parts).
✔ You are comfortable with small tools (screwdrivers, pry tools).
❌ Consult a professional if:
✖ The display is completely black/unresponsive.
✖ The phone is under warranty (DIY may void the warranty).
✖ Your phone is a foldable phone (much harder to repair).
Tools You’ll Need
Before starting, gather these essentials:
- Replacement screen (make sure it’s compatible with your phone model)
- Precision screwdriver set
- Plastic pry tools (to avoid scratching)
- Suction cup or guitar pick
- Tweezers
- Heat gun or hairdryer
- Adhesive strips or glue
- Microfiber cloth
Step-by-Step Repair Guide
Step 1: Back up your data
Warning: There is a risk of losing data when opening your phone. Please back up to Google Drive, iCloud or your computer first!
Step 2: Power off & remove SIM card
- Turn off the phone completely.
- Use a SIM eject tool (or a paper clip) to remove the SIM card tray.
Step 3: Soften the adhesive
- Heat the edges of the screen with a hair dryer (2-3 minutes) to loosen the glue.
- Do not overheat! ~60°C (140°F) is sufficient.
Step 4: Lift the screen
- Place a suction cup near the bottom edge.
- Use a plastic pry tool to gently pull upwards to separate the screen.
Step 5: Disconnect the old screen
- Locate the ribbon cables (usually on the top or bottom).
- Use a spudger to carefully unplug them
Step 6: Install new screen
- Connect new screen's cables (match old cables).
- Test it before sealing! Power on to check touch/display.
- Apply new adhesive around the edges.
- Press firmly for 30 seconds to seal.
Step 7: Reassemble and test
- Put back all screws and covers.
- Check touch, brightness, and buttons before finalizing.
Pro Tips to Avoid Mistakes
- Label the screws with tape to avoid mixing them up.
- Work in a clean, well-lit area (lost screws can be frustrating!).
- Watch a teardown video of the same model as yours(YouTube/IFixit).
- Don't force anything -- if it won't budge, check for hidden screws.
Common Beginner Mistakes
❌ Using metal tools (may scratch your phone or cause a short circuit).
❌ Skipping the adhesive (dust can get inside).
❌ Not testing before sealing (you don't want to reopen it!).
Still Nervous? Try These Alternatives
- Use a temporary screen protector (hides the crack and prevents further damage).
- Trade in your old screen for a new one (some stores will accept cracked screens at a discount).
- Sell parts (eBay etc).
Final Verdict: Is DIY Worth It?
✅ Yes, if: You have patience, the right tools, and own a mid-range phone.
❌ No, if: You own a new flagship phone (like iPhone 16 Pro, Galaxy S25 Ultra) - professionals will do a better job.
Need more help? Contact us at crm@parts4repair.com
Recent Posts
-
Why Does My Phone Screen Have Lines After Replacement?
You’ve successfully replaced your phone’s screen, feeling a rush of accomplishment. But when you pow …Jan 08, 2026 -
No Sound on Calls? Here’s the Hidden Setting You Missed
Few things are as frustrating as picking up a call only to be met with dead silence. You can see the …Dec 25, 2025 -
The Rise of DIY Repairs: Why More People Are Fixing Their Own Devices
For years, device repair felt like something only trained technicians could handle. But times have c …Dec 09, 2025


