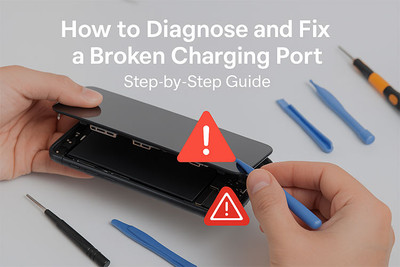
How to Diagnose and Fix a Broken Charging Port
A faulty charging port can leave your phone powerless—but before you panic or buy a new device, you might be able to fix it yourself! In this guide, we’ll walk you through step-by-step instructions for diagnosing and fixing a faulty charging port.
How to Diagnose a Broken Charging Port
1. Identify the Common Symptoms
| Symptom | Likely Cause |
| Phone charges only at an angle | Loose port or debris inside |
| "Charging connected/disconnected" flickers | Dirty/damaged port or bad cable |
| No response when plugged in | Dead port, battery, or motherboard issue |
| Phone says "Charging" but battery % drops | Faulty power IC or battery |
2. Check the Obvious First
- Try a different cable & adapter (faulty accessories are the #1 culprit).
- Test wireless charging (if your phone supports it).
- Inspect the port for:
-
- Bent/damaged pins
- Lint or debris buildup
- Corrosion (if exposed to water)
Step-by-Step Fixes for a Broken Charging Port
1. Clean the Charging Port
What You’ll Need:
- Toothpick or plastic dental tool (NO metal!)
- Compressed air
- Isopropyl alcohol (90%+) & cotton swab (for corrosion)
Steps:
- Power off the phone (safety first!).
- Gently scrape out lint with a toothpick (avoid bending pins).
- Blow out debris with compressed air.
- For corrosion, dab alcohol on a swab and clean the port.
- Let it dry completely before plugging in.
Pro Tip: Shine a flashlight into the port to check for hidden debris.
2. Test & Replace the Charging Cable
- Try multiple cables (preferably OEM).
- Look for frayed wires or bent connectors.
- Use a USB tester (if available) to check power output.
3. Reset Software Settings.
- Restart the phone.
- Clear USB settings (Android):
-
- Go to Settings > Apps > Show system apps > USB Settings > Clear cache/data.
- Update the OS (software bugs can cause charging issues).
4. Replace the Charging Port
If cleaning doesn’t work, the port may need replacement.
- For iPhones: Requires soldering (best left to pros).
- For Androids: Some models have modular ports (easier DIY).
Tools You'll Need:
- Precision screwdriver set
- Plastic pry tools
- Soldering tools (for some models)
- Heat gun or iOpener (for sealed phones)
- Replacement charging port (find your model on Parts4Repair)
Guides:
- Power off the device and remove the SIM card tray.
- Disassemble the phone carefully using the appropriate tools.
- Locate the charging port assembly (usually on the sub-board).
- If it’s soldered, desolder the old port and install the new one. If it’s modular, replace the sub-board or flex.
- Reassemble the phone and test.
When Consider Professional Repair
Seek help if:
- Pins are visibly bent/broken.
- Phone was water-damaged.
- You’re uncomfortable with disassembly.
When Replacing the Charging Port Won’t Help
Sometimes, your port may seem fine, but the issue lies deeper:
- Battery failure (won’t accept charge)
- Power management IC (PMIC) issues
- Damaged motherboard traces
✅In these cases, only advanced board-level repair will resolve the issue.
Prevent Future Charging Port Problems
- Use magnetic charging cables.
- Avoid using low-quality or non-certified charging cables.
- Keep ports clean.
- Don’t charge your phone in high-dust environments (like pockets or car vents)
- Charge wirelessly (if supported).
- Unplug gently—yanking the cable damages port pins
Need Quality Charging Ports?
Find 100% tested and reliable replacement charging ports for iPhone, Samsung, Xiaomi, OnePlus, and more at:
We ship worldwide and offer support for bulk orders and repair shops!
Jul 29, 2025
Recent Posts
-
How to Diagnose and Fix a Broken Charging Port
A faulty charging port can leave your phone powerless—but before you panic or buy a new device …Jul 29, 2025 -
Why Is My Replacement Screen Not Responding? Causes & Fixes
Did you just replace your phone's screen only to find it's unresponsive to touch? Don't panic. This …Jul 15, 2025 -
How to Fix a Water-Damaged Phone: A Complete Guide
Water damage is one of the most common (and frustrating) issues that smartphone owners face. Whether …Jun 05, 2025


